Lately we have been doing an extreme amount of swimming: our house, swim lessons, my Mom's, and every splashpad in between. In Arizona it's a must! But I HATE getting my whole bag of stuff, and my stroller, and the car, and everything else wet on the way home. Enter the wet bag (YAY!!!).

About a year ago, my little girl had super diaper rash (sorry, TMI). Seriously, it would NOT go away. Finally we started using cloth diapers, flannel wipes, and good ol' cornstarch. It worked great! And it was finally gone! Anyway, the store my mom got the diapers from had some awesome wet bags for sale. I got a small one that fits one cloth diaper in it, and a medium one that will fit two or three. With all the swimming we've been doing lately, we have been using the medium size wet bag non-stop. So, I decided to make a few more. They are perfect for all the wet swimsuits and swim diapers (I use the all-in-one BumGenius cloth diapers instead of disposable swim diapers). It all goes in there, and all my other stuff that gets toted along stays DRY!
The bags are made with a fabric called PUL (or polyurethane laminate) as the liner, and any fabric you want for the exterior. I used cotton quilting fabrics from JoAnn and the scrapbook store by me. The PUL can be purchased on-line at various retailers. I got mine from fabric.com, but they also sell it at JoAnn now by the recyled grocery bag fabric (which is great for making reusable sandwich wraps). When sewing with PUL you want to use a denim needle or a ball point needle (but I don't have either, so I used my universal one) and you want to use polyester thread instead of cotton. Also, try to avoid using pins- use hair clips or paper clips instead to hold fabric in place to lessen the amount of holes yo put in the PUL.
So, to make a medium sized wet bag you need:
a 12" zipper
1/2 yd PUL
1/2 yd exterior fabric
If you don't want to use PUL, you could easily use a light-weight vinyl or plastic sheeting, but I don't know how to waterproof the holes from the needle. Maybe a line of fabric glue along the stiches when you're done.
Okay, cut two pieces 12" by 18" from your fabric. Also, cut a 12" by 35" piece from your PUL or plastic so it is 12" by 17 1/2" when folded (you can cut your outer fabric so it is folded like this too if you prefer). You want the fold on one of the 12" sides because this will be the bottom of the liner and needs to be the most waterproof.

Place one piece of your outer fabric right side up. Lay the zipper on top of that with the teeth side down and the pull tab to your left, lining up the top of the zipper with the raw edge of the fabric.

Place your PUL on top of the zipper with the shiny side down, aligning it with the fabric and zipper. Clip these three layers together with hair clip or paper clips.

Using your zipper foot, sew all three layers together along the edge.

Flip the outer fabric and PUL back so they are wrong side together, and topstitch all three layers close to the zipper.

Now take the other outer fabric and place it right side up. Lay the zipper on top of it like you did for the other side. With the zipper teeth down, the pull tab should be on your right now.

Take the other end of the PUL and pull it up to the top of the zipper, shiny side down. (I forgot to take a pic of this) With the three layers lined up at the top, sew them together like you did for the first side. Fold this side out so the wrong sides of the outer fabric and PUL are together and topstitch like you did before. This will be a little trickier on this side because the PUL is folded around. Just hold the folded side out of the way and be careful not to snag it under itself while you topstitch by the zipper.

Now, slide your zipper open about halfway, or flipping it right-side-out will be very difficult later.
Place the outer fabrics right sides together, and the PUL should be shiny sides together. Starting in a corner by the folded side of the PUL, sew along one long side of the PUL and outer fabric, the short side of the outer fabrics, and a couple inches down the other long side. Leave about a 3" opening for turning later. Then continue sewing the rest of the remaining long side of the fabric and PUL. (pictures below)

When you get to a zipper, fold the teeth up toward the outer pieces of fabric, and the flaps should point toward the PUL. Hopefully these pictures help my description.


The orange lines of this picture were supposed to show where I sewed. I guess I should have made them bolder. The opening is being left in the outer fabric instead of the liner because we want to seal the seams on the PUL to make them very water proof, and I don't think we can do that if we have to close up a hole later.

This next step can be done a few ways. I have heard that running a bead of fabric glue over your stitching seals them up. Also, washing and drying it on high heat is supposed to work. The way I am going to use is a hot iron to melt the shiny PUL sides together.
I use my wooden yard stick as a guide so I don't iron too far into my liner, and so I have a nice even seam. Make sure there is no shiny part of PUL sticking out, or it might melt onto your iron. Turn your iron up to a high heat with no steam. Placing your yard stick about 1/4" inside of the seam, and holding it very firmly, iron very slowly over the seam and outer edge of PUL. Go over each side a couple of times for a good seal.

Trim off any excess from seams, and clip corners of the exterior fabric. Turn the bag right side out through the opening you left and the zipper you left open (you did leave it open right?). If you forgot, try to wiggle it open a little so you can turn your bag. Don't worry, I've had to do that a few times too.

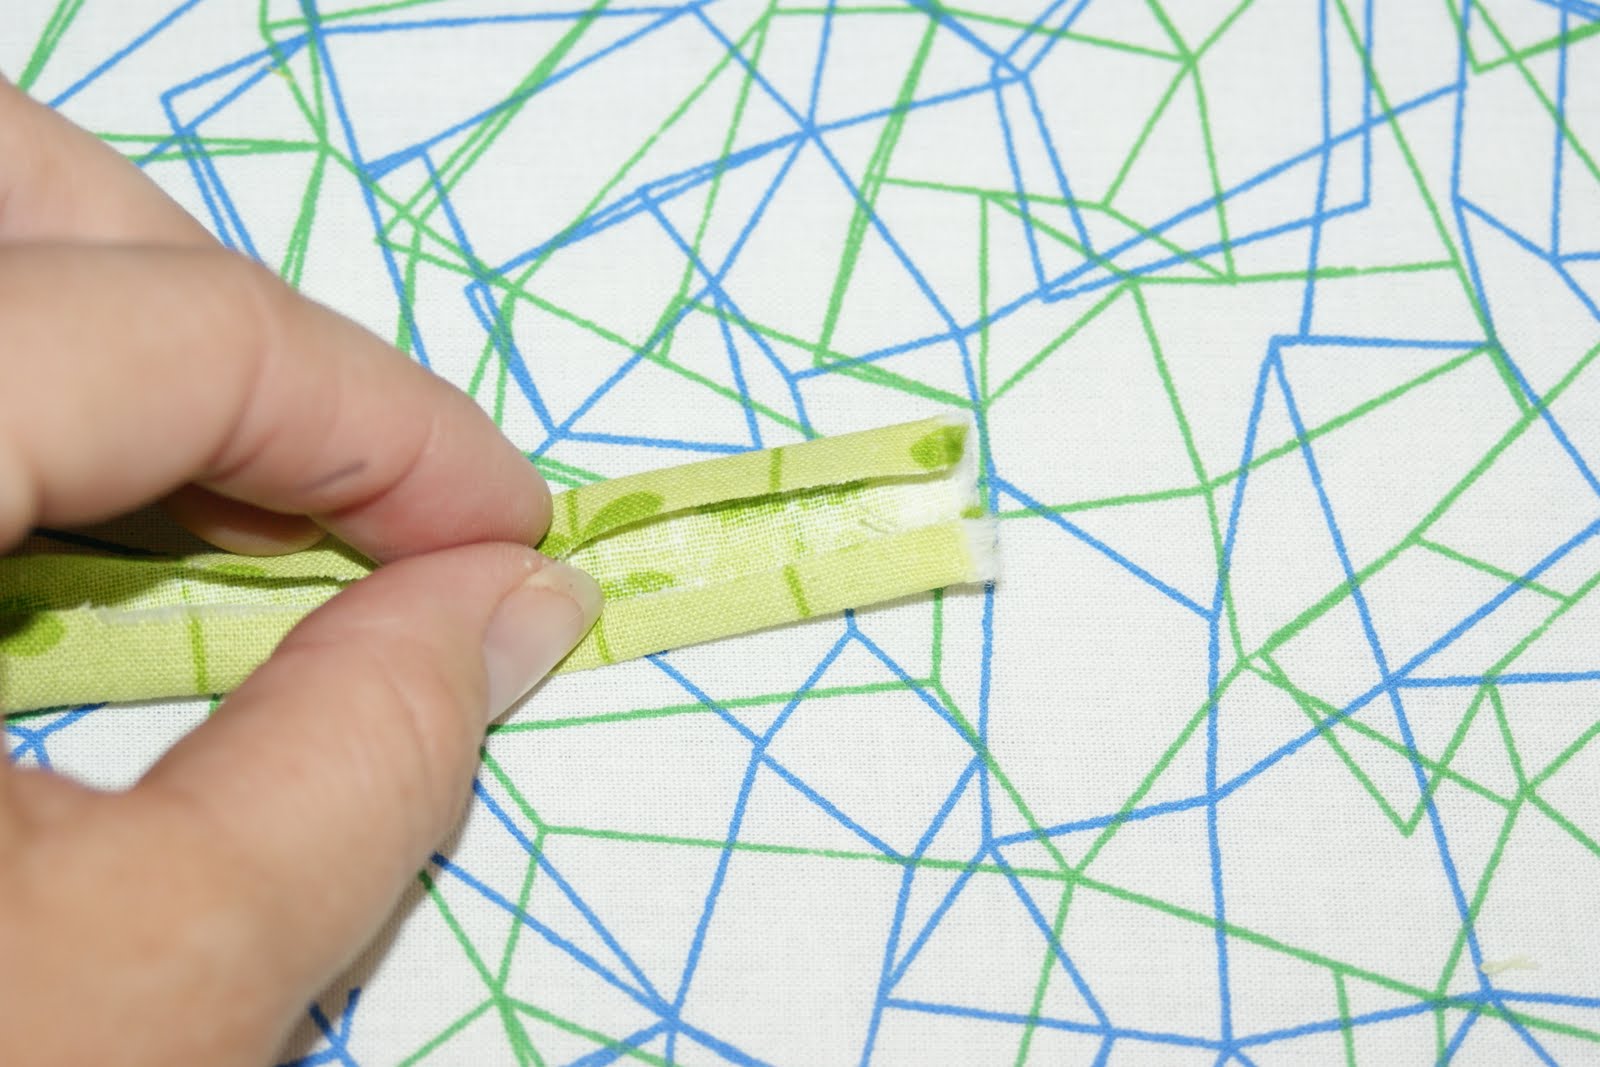
Check your PUL to see if it's sealed by gently pulling one of the seams open (GENTLY).

If you have a tag, insert it in your opening, then sew it closed with a very small seam allowance.

You are done! Go hit up the closest beach, pool or splashpad, or just go out back and slide it up, and have a blast!