With three small kids, I am always on the lookout for quiet activities to bring along with us. Whether it is for church, waiting rooms, or at a restaurant, it seems like we always have a little time where it would be nice to have them busy doing something quietly.
I like the file folder games, but don't really want to carry a folder for each game, and the velcro is a bit noisy. I have made some magnet boards for our house that I really like and thought maybe they would make good books too. They turned out really cute, and the kids love doing the magnet stories. They are super easy, and don't take long to make.
To start, you will need:
19”x14” piece of outer fabric
19”x14” piece of inner fabric
19”x14” piece of fleece or quilt batting
20” of strap webbing (cut into 2- 10” pieces)
2- 8”x12” pieces of sheet metal (roofing section at Home Depot)
2 pieces of scrap cardboard about 8 ¼”x12 ¼”
some masking tape
For all fabrics, the 19” sides will be the top and bottom, and the 14” will be the sides. If your fabric has a pattern that has a right way, make sure you get enough so the pattern isn’t sideways. If it can go any way, 1/2yd will be enough to make two. The outer fabric can be whatever you want. The fat quarters work well if you don’t want to buy extra fabric. The inner fabric I used was a solid color cotton, but you can use flannel if you want it to be a flannel board too, but some magnets might not be strong enough to hold on through the flannel. I like to use fleece instead of batting so the cardboard doesn’t get stuck on it when I slide it in, and I like it to be padded, but not too squishy.
Find the center of one of the 14” sides of your outer fabric.
Place the edges of one strap 1 ½” above and below that center mark so there is 3” between the ends. The ends of the strap should be even with the raw edges of your fabric. Pin in place well, and repeat for the other 14” side. (you can melt the edges of the straps with a lighter so they don’t fray)
Lay your fleece down and place your outer fabric face up on top of it. Next, place your inner fabric face down over that. Pin those three layers together. (note: this picture shows a different outer fabric, but the instructions are the same)
Sew through all three layers, down one side, across the bottom, and up the other side leaving the top edge open.
Flip right side out and iron seams so they are nice and crisp. Fold the top edge in about ½” and iron.
Next, fold the whole thing in half like a book to find the middle and iron a crease down the center. Or, find the center and mark with pins.
Following the crease or the pins, sew a seam down that center line to create two pockets at the top.
Sewing very close to the edge, top stitch around the sides and bottom (still leaving the top open).
Now tape your metal sheets onto the cardboard making sure you cover the metal corners so they don’t cut through the fabric after awhile.
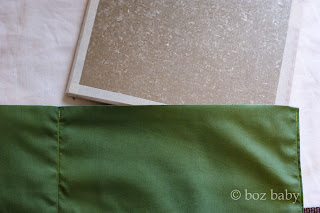
Slide the metal and cardboard into the pockets with the cardboard toward the fleece and the metal facing the inside fabric.
Sew the top of the pockets closed with a small seam allowance to match the topstitching you did around the other sides.
That’s it. Your magnet board book is finished!
Here are some ideas of things to use in your magnet books:
file folder games or felt board stories
here
whole things cut in half to match up (butterflies, balls, shapes, etc)
poetry or word sets from the store that you make sentances with
family or magazine pictures cut into puzzles
favorite scripture heros
paper dolls with clothes (princesses, pirates, snowman, etc)
here
characters from favorite shows or books printed from websites to act out stories
nursery rhymes or little songs (five little monkeys)
There are so many different things you can do for these. After I print and color my pieces, I laminate them so they last longer. You can use packing tape to do this if you don't have a laminating machine. Test the strength of your magnets before you stick them on all your pieces to make sure it is strong enough. Also, sticky magnets don't always stick very well to laminated things. So if you use this kind of magnet, maybe print your pieces on heavy cardstock and only put the packing tape on the front so the magnet can stick to the paper on the back. Don't use hot glue to attach your magnets, because sometimes the heat can affect their power. The magnets I like best are ones I got online. They are small discs I found from
http://www.kjmagnetics.com/ . They are very small and really strong. I used some E-6000 glue from Michaels, and that has worked really well.
If you are doing a paper doll or a scene with characters, try to put the magnets for the background or doll off in the corner where you won't be putting other pieces over them.
My kids love using these at church, and other places too. I have individual games/activites in ziplock bags to make it easy to find the one you want. If I think of other ideas for activites, I will add them to the list above.
I hope you all enjoy these! They are fun to have around, and make great gifts for birthday kids too!


