Wednesday, May 22, 2013

Tanner's One!

Our baby Tanner turned one today! He had a fun day full of everything he loves, well mostly.  After we ate breakfast and danced to all the birthday songs on our iTunes (twice), I gave him a birthday haircut that he was not a fan of.  Then I was rude enough to give him a bath to wash off all the extra hair.  The good news was that it was then time for playgroup at the park.

We decided since our family wasn't here to celebrate with us, we didn't want to do a real party at our house.   I made some cupcakes and brought them to playgroup with us instead.  So we grabbed our cupcakes and snacks, and headed to the park.


Berkeley was quite insistent that Tanner wanted pink frosting, but I talked her into the blue eventually.  She decided it tasted pretty good too.


We picked out a cupcake just for Tanner, and let him go to town.


However, he was not impressed at all.  He looked at it for a few minutes before he thought about doing anything with it.


When he finally touched it, he looked pretty disgusted with the sticky blue stuff on top, and tried to take it all off and drop it on the picnic table.


After he got the frosting off, he started having more fun with it.  He liked smashing it up and even tried eating some!  Then he decided that it was pretty good after all.


He ended up eating most of it.  We played at the park some more.  He got a kick out of chasing the bubbles the older kids were blowing.  He had a good time.


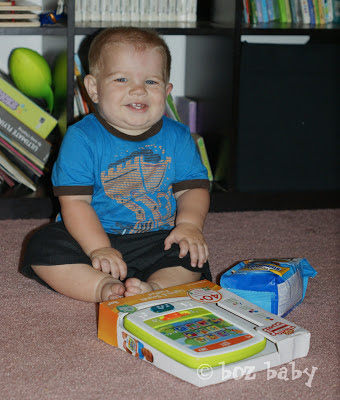
In the evening, we gave him his presents, but he didn't seem too excited about that.  He just wanted to play with Dad's football.  But he smiled anyway.


We had a picnic in the backyard for dinner.


I think he felt left out by not sitting at the picnic table with the other kids.


When they were done eating, he helped himself to Brady's seat- and his corn cob.


I made him a couple new pairs of shorts for his birthday.  He's getting so big it doesn't seem like he wears them very long before I need to make new ones.


The grocery store by us in New York gives you a free cake for your kid's first birthday.  So we picked up his birthday cake this morning so we could have it after our picnic.


He didn't really know what to do with the candle, so the other kids took turns blowing it out for him.  Maybe next year we will have to practice first.


I wanted a picture of Stephen and Tanner with their cake faces, so Stephen got nice and close to him for me.


Maybe a little too close though.  Tanner slimed him!  Right on the face too.


I think Berkeley licked her plate clean.


And the boys both got plates full of cake to the face, courtesy of Dad.  They thought that was great though!


After the picnic and cake party, Stephen had his first grade concert, so we all cleaned up and headed to the school.  (bottom right corner) They sang songs about being bugs and going to picnics.  It was very cute; he did a great job!


It was a very fun day.  Happy Birthday to Tanner!

Sunday, April 21, 2013

S'mores Cupcakes

So, I know this is nothing new to most of you, but I've never made these before, and they were awesome!  I have been trying to get better at making cupcakes, and the best way to do that is to practice.  I was looking through my recipes, and I came across one for coconut s'mores cupcakes and thought it sounded good.  The instructions were a little more than just throw it in a bowl and mix, so I was a little unsure I wanted to try it.  But I'm really glad I did!


I don't remember where I got this particular recipe, but there are many similar ones out there on the web.  The one I used had coconut sprinkled on the frosting too, and I didn't do that.  Otherwise, I followed the directions pretty well.


The batter looked heavenly- almost like chocolate mousse.  Cake batter doesn't always look so tasty to me, but this one surely did.  I resisted though, and poured it in the baking cups instead.  The recipe made 30 regular cupcakes and 24 mini cupcakes with a little left over.  It was a lot of cupcakes!


This marshmallow meringue frosting was so fluffy and...well, marshmallowy.  The next day it was pretty dry- more like the meringue.  But I didn't put it in an air-tight container or anything.  That might have helped it stay moist.  But they were still delicious that way too.   One batch of frosting was enough for all the cupcakes, but just barely.


As I was getting ready to take some of these to my little Sunbeam class at church, I tried to find a good way to get them there.  I didn't want to take my whole mini cupcake pan with me, but I also didn't want them sliding around in a container that they didn't fit well in.  My empty egg carton was sitting on the counter, and amazingly, the holes were the perfect size for mini cupcakes!  They fit great! They couldn't slide around, and the lid had extra room for the frosting.  I couldn't have made a more perfect way to transport them!  I just thought I would share that little trick I learned today in case anyone else needs to move many little cupcakes.  It was just perfect!

Anyway, on to the recipe!  This is more steps than I am usually up for, but it was so worth it!  After you frost them, sprinkle on some crushed graham crackers and add a small piece of chocolate.  I hope you enjoy them as much as I did.


Chocolate Cupcakes
1 cup unsweetened cocoa
2 cups boiling water
2 3/4 cups sifted flour
2t. baking soda
1/2 t. salt
1/2 t. baking powder
1 cup butter
2 1/2 cups sugar
4 eggs
1 1/2 t. vanilla
In a medium bowl combine cocoa and water mixing with a whisk until smooth. Cool completely. Sift flour with baking soda, salt, and baking powder.
Preheat oven to 350 degrees.
Beat on high butter, sugar, eggs, and vanilla 5 minutes.
On low blend in flour mixture and cocoa mixture
Do Not Overbeat
bake approx 18-20 minutes

Marshmallow Meringue Frosting
2 egg whites
6 T. cold water
1/2 pinch salt
1 1/2 cups sugar (you can use much less- like 1/2 cup)
1/2 t. cream of tarter
In a double boiler with the water boiling blend all ingredients
then beat with electric beater (while still over boiling water)
until stiff peaks are formed. It takes 7 minutes.
On low beat in
1 cup mini marshmallows until melted.
remove from heat and add 1 t. vanilla.

Wednesday, April 10, 2013

Mini Pineapple Cheesecakes

With a ten month old baby in the house, I end up with A LOT of empty baby jars.  I use some for storing snacks, buttons, and other crafts.  Even after everything I can think of to use them for, there are still way too many.


I came across a recipe for small pineapple cheesecakes and wanted to try making them.  I don't have any cute glass individual serving dishes like they had in the photo, so I thought I would try them in some of my extra jars so I could give some away too.


The recipe made quite a lot.  It filled up 17 little jars, so I had plenty for us, and lots to give away.  The ones for us were just in plain jars, but for the gifted ones, I wanted them a little cuter.  I made some labels on my Silhouette software, printed them on a full-sheet label, then cut them with the Silhouette.  I put a skinny strip of scrapbook paper around the jar and secured it with the front label.
My printer has been acting up lately, so the colors turned out a little different than I had planned, but are still cute.


I spray painted the lids (which I would suggest doing a day or two before hand so they don't smell like paint) so they would be cuter and not have the brand around the rim.  Then I added the pineapple labels to the top and was done!


Friday, March 8, 2013

little ties for little guys...and gals

The other day a friend asked me if I could make a tie for her little boy to match some skirts I was making her girls.  And I thought...duh!...what a great idea!  Why have I never tried that before?!  My mother-in-law made some really cute ones for the boys a few years back for Easter.  They still love them! 
 

So, I thought I should give it a try.  I looked around blog land for ideas and instructions, and came up with a pattern that so far I'm happy with.  I wanted to make quite a few, so I didn't want a pattern with too many pieces.  I made one for a baby/toddler that is pre-tied and snaps at the back of the neck, and a regular tied one for an older child.

They are pretty easy and quick to put together.  You need to cut one piece out for the tie and another piece for the backing.  For the baby/toddler tie you also need a strip for the neck 16" by 2 1/2" is what I used.  You could also do elastic for that piece.

Patterns:
Baby/Toddler tie
Child tie
Once you print out the pages for the patterns, cut out the pieces and line them up so you can tape them together, or trace them onto something stronger like posterboard.  With the child tie, you can leave it as two pieces and sew them together, or tape the whole pattern together and have one long piece.  When I made some of mine and wanted one long piece so I didn't have to sew them together and have a seam in the middle, I took the two pattern pieces, laid them on my fabric and made it as long as I could.  Then I taped them together so I could trace it on my front fabric and backing fabric.

On the ties for the older kids, my pattern was in two pieces because I wanted it longer than my piece of fabric for this one.  But I found that the 44-45" that most cottons are was just fine.  So for the others that I made, I just had one long piece.


The steps are the same for both sizes/styles of ties.

Once you have you fabric and backing cut out, place them right sides together.


Using a 1/4" seam allowance, sew the two pieces together only at the pointy ends, leaving the long sides open.


Flip the tie right side out, and iron the ends so they are nice and crisp.  Then take the tie and fold it longways so the front (your outside fabric) has it's right sides together.  Sew the long edge closed with a 1/4" seam allowance all the way down.  Do not sew the pointed edges closed.


Using a safety pin, pull the smaller end of the tie all the way through until the whole thing is right side out.  Then iron it nice and flat so it looks like a tie.  If you are making the child size, you are finished!  Pretty easy huh?  If you are making the baby/toddler size, go on to the next step to attach the neck piece.


To make the piece that goes around the neck, take that strip of fabric you cut and fold it in half with the right sides together.  Sew down the long edge, leaving the ends open.  Turn it right side out and press flat with an iron.  Tuck in the ends and sew them closed.  Then you can add a snap, button, or velcro to the ends to secure it.  Or you could use a smaller strip of fabric, say 6-8" and sew in elastic for the rest of the strip.  Just secure it in the ends before you sew them closed.

Once you have your neck piece finished, you need to tie the tie.  Fold the tie over the neck piece with the skinny end in the back and the fat end in the front.


Pull the neck piece up a little into a V to make the rest of the steps a little easier.


Take the skinny end and lay it across the fat side.


Then bring it behind the neck piece and stick it up in the back.


Pull it down through the hole between the fat end and the knot you have made.


Then you have to slide the skinny end around to the back.  Just keep shifting the front until it looks good.  You can hand stitch the skinny end to the back of the fat end to keep it in place, just be sure not to sew through the front of the tie.


You should have a cute little tie for your cute little guy.


Now you can let them go goof off and be silly.


If you're like me, they probably deserve some time off after the (seemingly) endless times I asked them to come here for just a sec so I could try one on them just this last time.


They were good sports though.  And Berkeley was feeling left out wondering which one was for her, so I made a purple and red one just for her to wear.  She was quite happy with it.


It's funny, in these pictures it looks like my kids actually get along and maybe (gasp!) even like each other!


No complaints here though.  Even if it's just for a few minutes here and there, I'll take it.  They were good sports, and really are sweeties!


And they all got a kick out of Tanner eating the mud during the photo shoot too!